Learning Objectives
Upon completion of this unit, students will be able to:
- Use the App Inventor environment to open, update, and test an app.
- Identify the Designer and Blocks Editor components of the App Inventor environment.
- Modify code blocks and component properties to alter an app's appearance and behavior.
- Test and debug a project.
Lesson Plan
Activity
🔽 Review and Introduction to Lesson Hello It’s Me
- Review the App Inventor environment to reacquaint students with the different parts of the interface. Open App Inventor on the teacher's screen for students to see. Encourage class discussion with the following prompts:
(1) Where is the layout of components made and added to? (Designer)
(2) In which window do you write the blocks for your app? (Blocks Editor)
(3) What changes were made to the TwoButtonGame app? (Shape and colors)
- You will create their own app in this lesson, using information about themselves in the app. Demonstrate the sample(sample .aia files are above.) Supplies needed for the class include your photo image file and your voice sound file. If you are unable to prepare these files, you will be provided with pre-prepared image and voice files. Alternatively, you can obtain free image and sound files from pixabay.com.
🔽 Coding Activity
This app features a button with a prepared image. When pressed, the app will play a pre-recorded your "Hello, it's me" message or another prepared sound. To get started, follow these steps. (Or refer to the Youtube link or Student Guide above.)
- Create a new project called "HelloItsMe"
- Click "Start new project" located at the upper left-hand corner. You will be prompted to enter a name, "HelloItsMe", and then click "OK". This should automatically open the new blank project titled "HelloItsMe.”
- Upload the image and sound files that have been prepared, or provided files above.
- The screen you see here is the Designer screen for App Inventor. The phone image represents what your device will look like when you finish the app and try it on your own mobile device.
- Go to the Media bin here and upload the prepared image and sound files from your computer. What we're going to use the image to put on the button in the Viewer. Clicking on "Upload File", and then choosing the file that is in your computer. Once you've uploaded both files, you should see both of them down here in the Media drawer.


- To create the desired user interface, drag a button and a label from the User Interface drawer. The button will allow the user to trigger an action, and the label will display the corresponding message. To play a recording, drag a player from the Media drawer. If you click and drag it in, it will appear on the screen and in the Components section. This keeps a list of the components in your app.


- The player is not located in the User Interface section, but rather in the Media section. If you click and drag it into the screen, you'll notice that it doesn't appear, but it is present in the components. Additionally, if you scroll down, you can see that the player is a non-visible component. This means that nothing appears on the screen, but it still operates in the background to play your sound.
- Customize the Properties.
-
Button1 Properties
1️⃣Click on "Button1" on Components, its Properties tab will show up on the side. These have various properties that you can change for the looks of the button, including the background color, the font size of the text, its height and width.
2️⃣Let's make the button larger on the screen. Set its height to 300 pixels and its width to "Fill parent". "Fill parent" will take up the entire width of the screen.

3️⃣ Change the image of the button to the image prepared. Click on “image”, and click on the image that you uploaded. You don't need text anymore, click text and just delete it.


-
Label1 Properties
1️⃣ Set the text to "Hello, it's me". Adjust the font size to 26 and align it to the center. Change the color of the background and text as desired.
2️⃣ Set its width to "Fill parent".

Player1 doesn't have many properties since it's only there to play the desired sound. However, it's crucial to specify what sound it should play. You can find this information in the Source. The Source indicates exactly what the player should play, so let's click on it and have it play the recording of the words "Hello it's me". Now, all of the necessary properties are set up in the Designer view.

- Click event in the Blocks Editor.
- You've set up the Designer component of your app, but the button and player aren't interacting yet. To make them interact, go to the Blocks section by clicking the "Blocks" button in the upper-right corner. In Blocks, you can code what the app should do: play the sound when the button is pressed.
- Custom blocks: There is a set of blocks for the button, label, and player - the three components that we included in this app.
- Button block: "When the button is clicked, do something." That's what we want. We want things to happen when the button is clicked, so we'll drag it into our viewer.

-
Player block: Call the Player to play the sound file. To achieve this, follow these steps:
1️⃣ Drag the "call Player1.Start" block from the Player section.
2️⃣ Snap it into the "Button1.Click" block.
This is the entire functional code of the app. When the button is clicked, the player sound will start playing.

- Testing: Students should test their app. You can test it out by going to "Connect" and click on the "AI Companion" to connect your mobile device using the MIT App Inventor companion app.

🔽 App Enhancements: Project sharing
Share your app code as an .aia file that can be loaded into App Inventor and remixed:
- Choose File | Export selected project (.aia) to my computer to export the source code (blocks) for your project. The source code downloads in an .aia file.
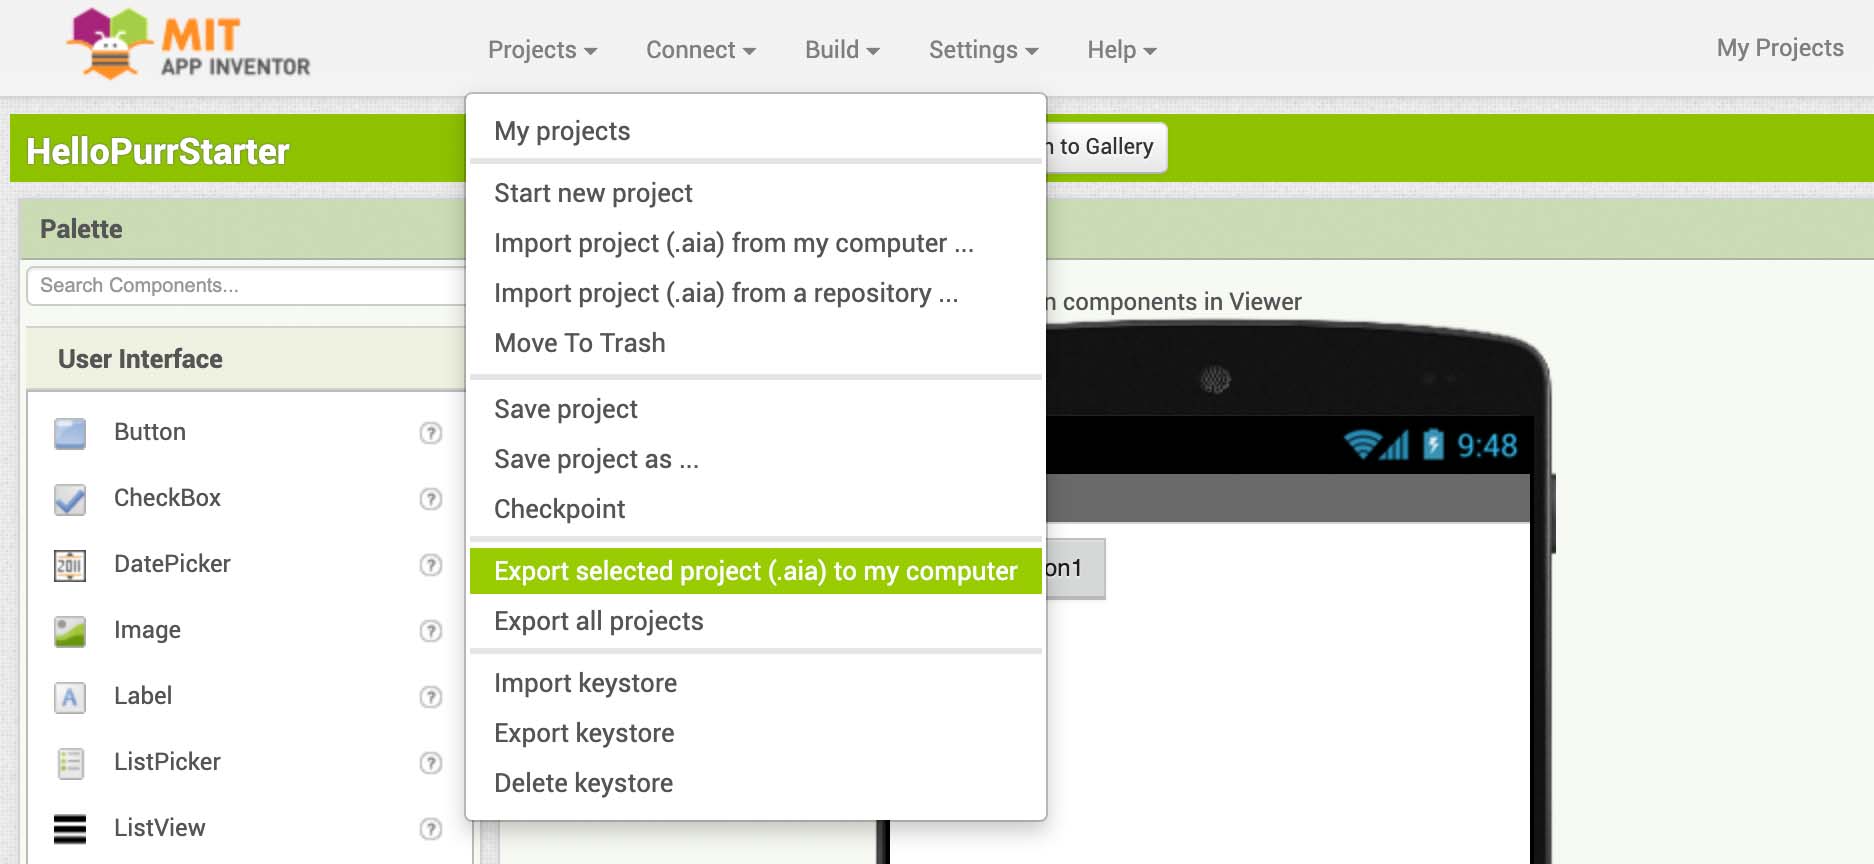
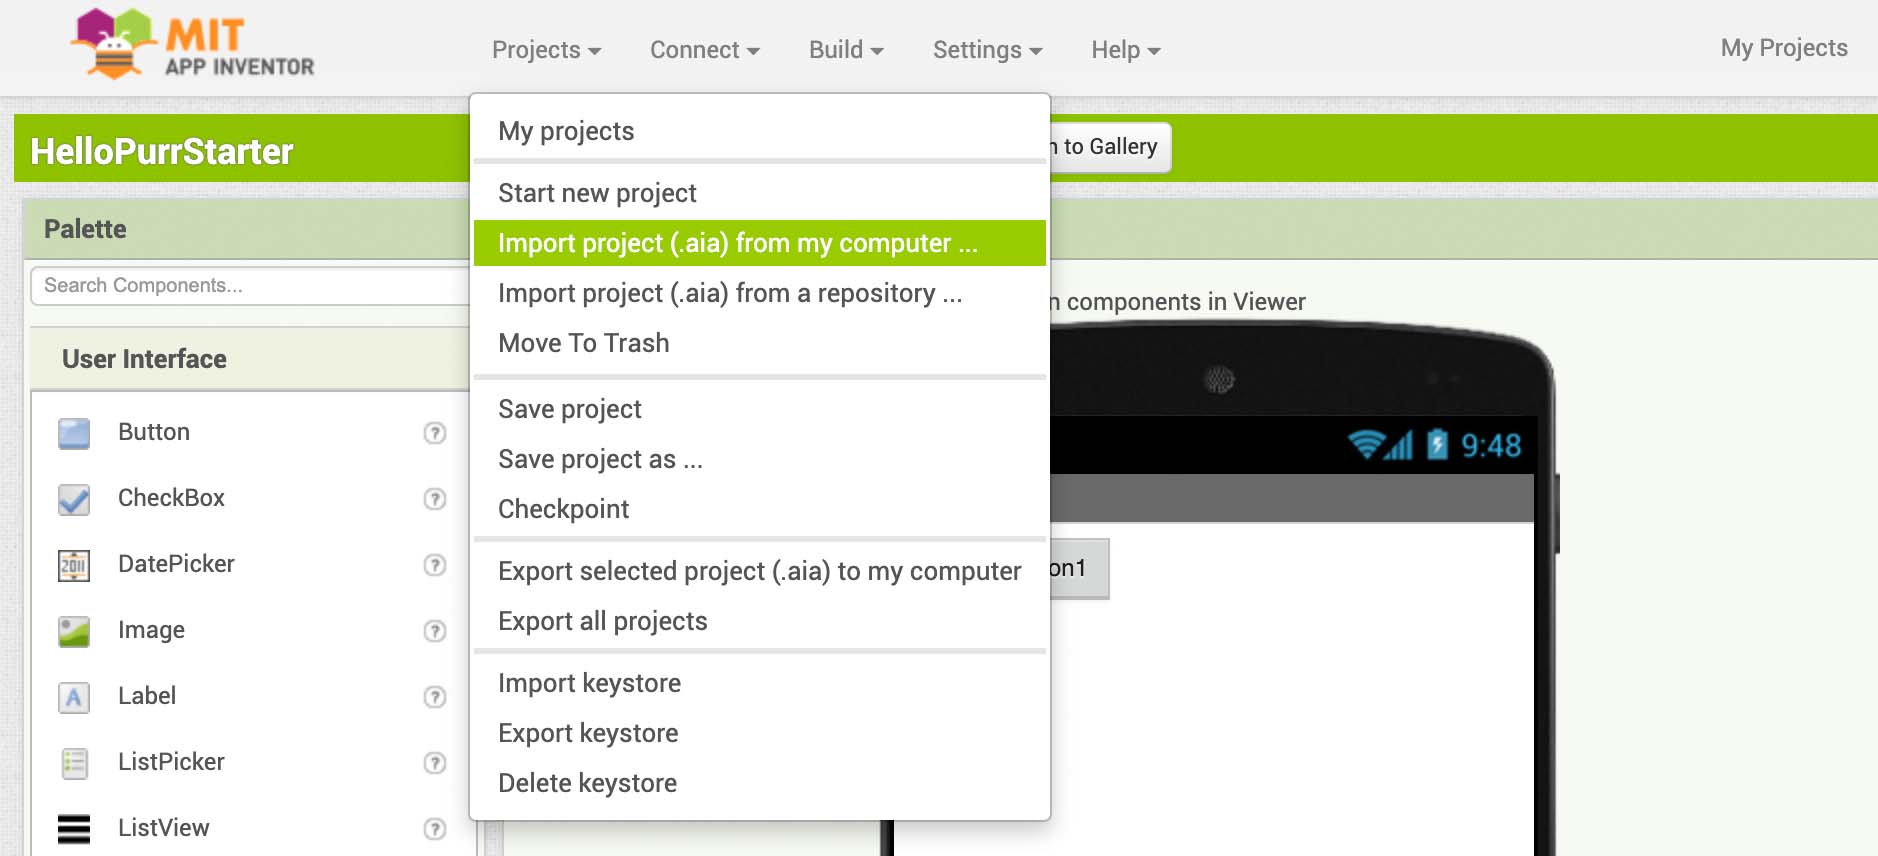
- If you send it to a friend, they can open it with File | Import selected project from my computer
One tip! Some email systems will reject .aia files, so it is better to link to your files on an online drive.
- How to create an APK file that can be permanently installed on your Android device(not iOS):
1️⃣ Under the Build menu, select “App (provide QR code fo apk)

2️⃣ When QR code appears, scan it using the tablet.

3️⃣ Install the app on your device. The app will remain permanently on the devices (unless uninstalled manually).
Closing
- Review Hello It’s Me by solving assessment problems together.

Answer: C